10 Steps to Starting A Business: My Process, Pt 1
Filed in: Business — December 28, 2023

back to blog


When it comes to starting a business, I can assure you that I had no idea what I was doing. I have no business background whatsoever and wanted to start a business in a completely new field. This could’ve deterred me, but just because I had no business background didn’t mean it was something I couldn’t learn. I’m a smart gal 💁🏾♀️, I can use my resources, and I may or may not like a challenge every now and then. So like many in my shoes, I turned to good old Google and YouTube to help get me started. It by no means replaces any formal business training, but you’d be surprised how well informed you can become with the internet at your fingertips. After months of research (yes months), I dove in and went through the following steps to get my business up and running:
- Brainstorming and dreaming big (yes this is a step, sort of)
- Learned graphic design skills
- Identified my brand and business name (yes they’re different for me)
- Secured domain names
- Created the brand elements
- Created my website
- Became more active on social media
- Applied for my LLC
- Set up client systems
- Started creating mock designs and blog content
- Officially opened to clients 🍾
Would I do anything differently? Surprisingly no. At the time of writing this at least, I think I went about it in the best way I knew how and prioritized what I felt was important. I also started with what was most exciting, and that kept my momentum up. However, this definitely would’ve been a smoother, faster process had I felt confident in my steps. A lot of these steps overlapped with the other, which is fine, but it felt a little chaotic and less organized than I would’ve liked. With that being said, I hope this article helps you start your business with more speed and confidence than I had in the beginning. Let’s dive in to the details —
Step 0
Okay so yes, this is a sort of b.s. step. BUT I feel like it’s important to acknowledge that without the brainstorming, hopes and dreams of what could be, I would have never taken the more concrete steps that came after. I have pages and pages of ideas in my Notes app that I eventually consolidated into more structured, detailed notes in Notion, which I still use to this day. I watched countless videos that both inspired me and made my alignment with this path even more sure. Don’t skip this step. It’s important.
“I think all designers fall victim to perfectionism of some degree, but the key is to not let it hinder your progress.”
Step 1 – Skill Development
Okay, now the real stuff. As I mentioned before, graphic design is a completely new field for me. Don’t get me wrong, I have some innate creative talents within me, but drawing, painting, photography, music, dance – these were the mediums I was familiar with. So actually learning the discipline of graphic design, and specifically web and brand design, was of the UPMOST importance. I didn’t feel comfortable doing anything else until I knew this was something I not only was good at but also liked doing. I already had a job I didn’t like at the time and quite frankly didn’t need another.
LEARNING PLATFORMS
Here are some of the main, helpful platforms I used:
- Udemy – This platform was really my jumping off point for skill development. I happened to come across a couple of courses that were stupid cheap thanks to a NYE sale, and I jumped on it. Not only are there graphic design courses, but this is a great resource for learning, well, anything. Take a look and don’t sleep on those sales, they run them often.
- Becca Luna Education – I genuinely can’t recall how I found Becca, but hear me when I say that the courses she offers are an investment worth making. I ended up snagging 3 of them on Black Friday, and my friends, they are not cheap. But the price reflects their worth, and I’m so glad I took the leap of faith to get them when I did. The BL courses specifically focus on all things Showit web design, and I highly recommend them if that’s what you also want to get into. They opened up a whole new world of potential for my business and are why I offer a lot of the things I do.
- Thinkful HQ – This online bootcamp is the most formal course I took to learn graphic design skills. I actually started with this program before finding Udemy, but the gag is that I didn’t finish it. Don’t get me wrong – the UX/UI program is wonderful, buuuuut I quickly realized that I was only interested in the UI (user interface) side of things, not so much the UX (user experience). Now I do utilize both when designing today, but this course is really for those that want to get a more formalized job in graphic design. That’s just not what I needed.
Stay tuned for an upcoming post with more in-depth details about the specific courses I took. Describing them here would’ve made this post longer than it already is 😂
Step 2 – The Name Game
In the process of learning graphic design skills, I started really getting serious about what I wanted this business name to be. I wanted something catchy that was easy to say, reflected my name without being my name, and could expand if I needed it to. I had a long list of potential names that I wrote down in my brainstorming phase, but I finally settled on:
My Brand Name: TJ’s Atelier
My Business Name: TRJ Creative Co., LLC
Now you may not have even realized these were different, but here’s my justification for why I have two names. I came up with TJ’s Atelier first, and I knew I wanted this to be the name that functioned more as a service-based, client facing business. However, I knew that I potentially wanted to sell products at some point, and I wanted a broad name that would cover both graphic design services and other creative endeavors I might get into. SO I decided to name my actual LLC something different. Products fall under the broader LLC, service falls under the brand or “doing business as” name. Most of my products are digital and can manage themselves in a way. So in the event that I no longer want to or am not able to continue offering direct client services, my LLC can stay active as a product-based business only.
This may seem illogical and unnecessarily complicated to anyone with a business sense. Honestly I almost confused myself 😅 But it’s what I chose to do, it works for me, and I get to use both names that I love.
Step 3 – The Domain Name Game
Once I solidified my business names, I ran to the world wide web to secure my website domain names. That’s all the fun stuff that comes after “www.” There’s nothing worse than having a name all picked out and ready to go, only to find out that your website is being used for an art museum or woodworking shop. Previously, I used GoDaddy for a domain name (this is my true web design origin story, not now though), but since I was really serious about this business, I decided to do a little more research. I landed on Namecheap as my domain registration service because they’re, well, cheap. The interface of their website isn’t my absolute favorite, but they offer a lot of great features, they do everything I need, and they had been around for a couple of decades.
A little tip here: if you want a website that has a non-traditional handle, grab the more traditional version as well if you can. For example, my domain name is tjsatelier.co, but I also own tjsatelier.com and have it redirect to my .co site. This ensures that clients still find me if they accidently add that extra “m.”
Now that I had my domain names secured, I got to get into the really fun stuff – creating the brand.
Step 4 – The Fun Stuff
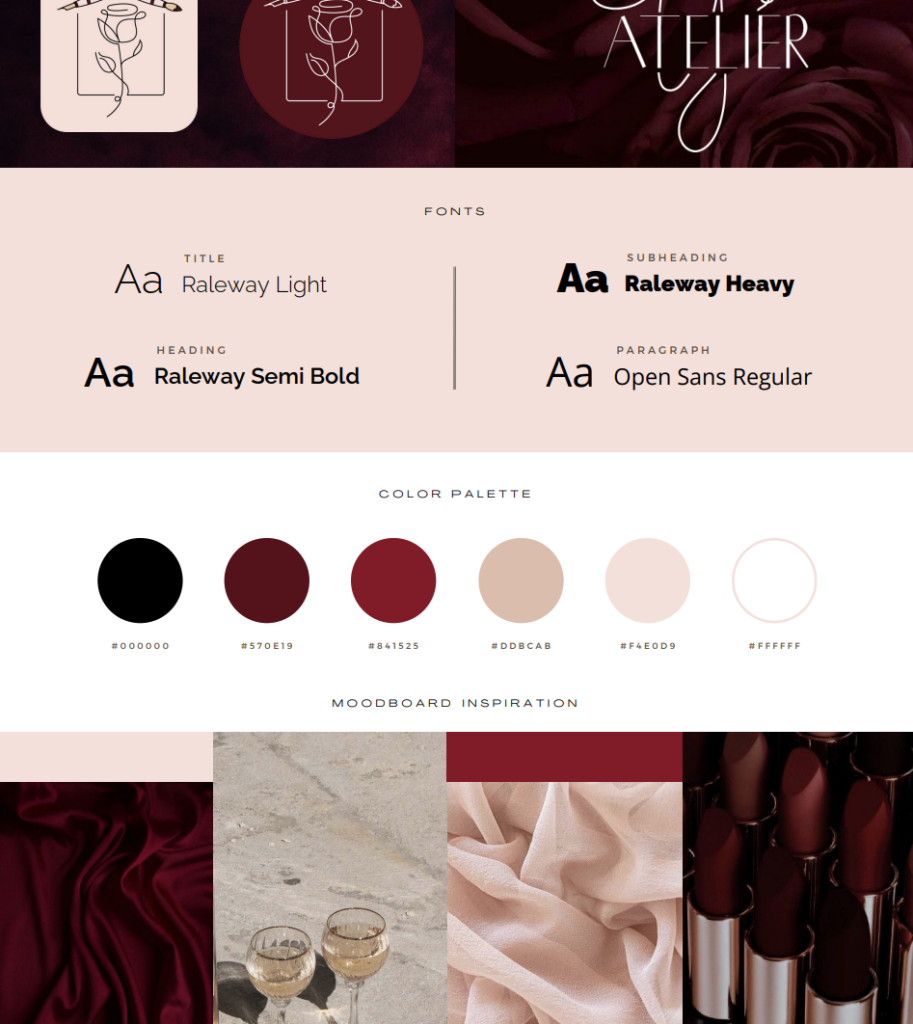
Aside from creating the actual website, figuring out what exactly I wanted my brand to look like was the part of this process I was most looking forward to. I didn’t even get through an entire Adobe Illustrator course before I dove in and started creating my logos. They needed to be chic and uncomplicated, but also fun and interesting. I think I captured both, what about you?
For my color palette, I pulled a couple of different options from Pinterest but ultimately landed on a palette that encompassed my favorite color of all time – red, specifically this deep wine/burgundy red. I did a poll among family and friends and that was the overwhelming consensus: there has to be some red!
Typography, I found, was and still is quite a challenge for me. Admittedly, a lot of them look alike, and there’s definitely an art to finding a group of fonts that go well together. I stumbled upon this website by Hey Reliable that helped me choose fonts to start with that were easily accessible. By easily accessible, I mean free.
Step 5 – More Fun Stuff
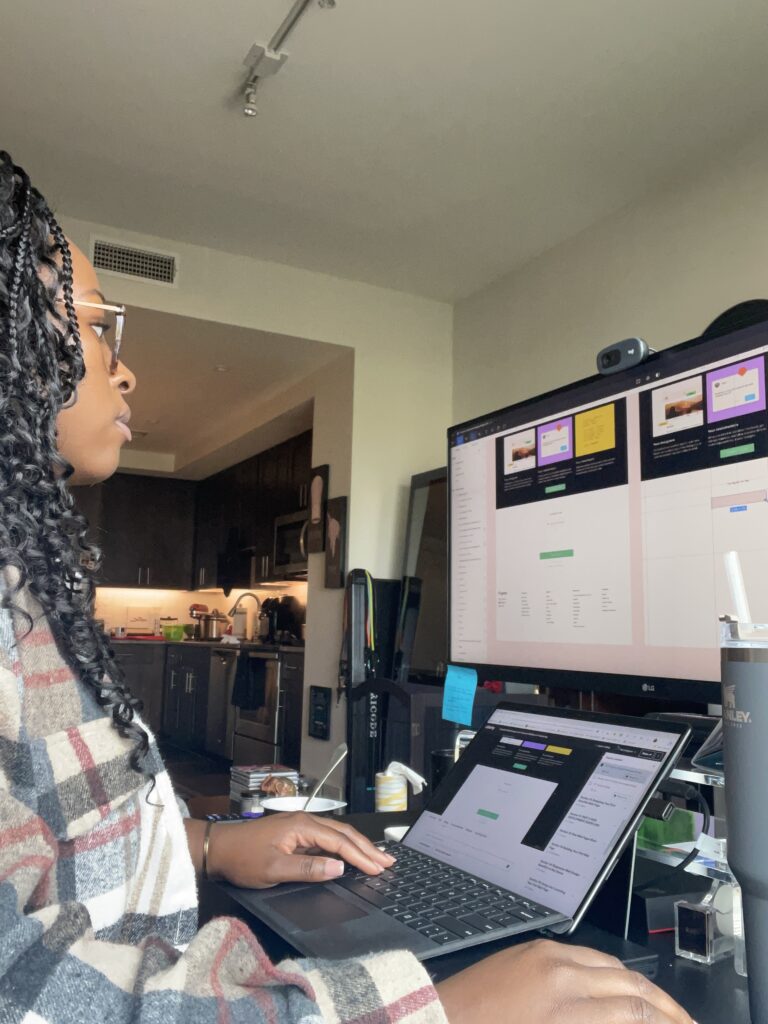
So like I mentioned, creating my website was THE thing I was looking most forward to. Everything I did above was with the intent of getting to this step as fast as possible. I currently design primarily in Showit, but I originally started out using Webflow based on the initial web design training I received from a Udemy course. Webflow is a great platform, but I ultimately found Showit easier to use and less restrictive when it comes to creative freedom. I may also be jumping into Wix soon, as it seems to be a happy medium between Webflow and Showit. If you’re interest in hearing more about my thoughts on the three web design platforms, stay tuned for a future blog post about that.
Finding Flow
As fun as this site creation step was, it took a WHILE and was a step that overlapped with the next few. I went through a few different iterations of the layout before I settled on the current version. Even then, I still find things I want to tweak and mayyy do that from time to time behind the scenes. I think all designers fall victim to perfectionism of some degree, but the key is to not let it hinder your progress. I also found that I was trying to do too many things all at once, and it quickly became overwhelming. Here’s a snippet of the general process I now go through to avoid perfection paralysis:
- Make an outline of each page and the general sections I’ll need within each.
- I’ll do this in Notion, Figma, on pen and paper. Doesn’t matter. Think of this as sketching before you begin painting.
- Create the homepage outline in Showit.
- I try to get my text in roughly the correct size font, but I will use dummy text and placeholder images in this phase to keep things moving.
- I do just the homepage first, because I may copy it and reuse certain aspects for other pages. It just speeds things up later.
- Add color if not done already, resize fonts as needed, add photos, add basic copywriting.
- Optimize the mobile view. Validate that the website looks good on a bigger monitor too if available.
- Create the remaining pages with the same process.
- Add animations and interactions. Connect buttons and links to the correct places. This is essentially the clean up phase.
- Connect your domain and launch!
Again this is a very general list I flow through, and it doesn’t take into account adding specific plug-ins, blogs, or e-commerce features. However, it helps me keep moving through the process, and the details trickle in as I go along.
Like I said, my first website took forever to create, and I didn’t want it to hold me back from doing other things. While I was going through this process, I figured this was the perfect time to reinvigorate my old Instagram account.
Okay you’re probably wondering where the rest of the article is. Don’t kill me, but I decided to continue the rest of the post here. I know I know, but I didn’t want to lose you, and this current post is l e n g t h y. All important things, but you know, it’s a lot. So keep reading to get details on how I started my business in Part 2.
As a token of my appreciation, an “I’m sorry for cutting off the post halfway,” and maybe a small bribe, here’s a code for 10% off anything in the shop (BIZBLOG10). And if you’re reading this before the shop is live? Well, it’s a lifetime code so just keep it somewhere safe 😉
Leave a Reply